;)


;)
;)
;)
;)
;)
;)
| Home » Categories » Remote Control » Netop Host | ||
How to enable permissions for Netop Host on macOS 10.14+ |
||
|
Article Number: 507 | Last Updated: Wed, Nov 20, 2019 10:05 AM
|
||
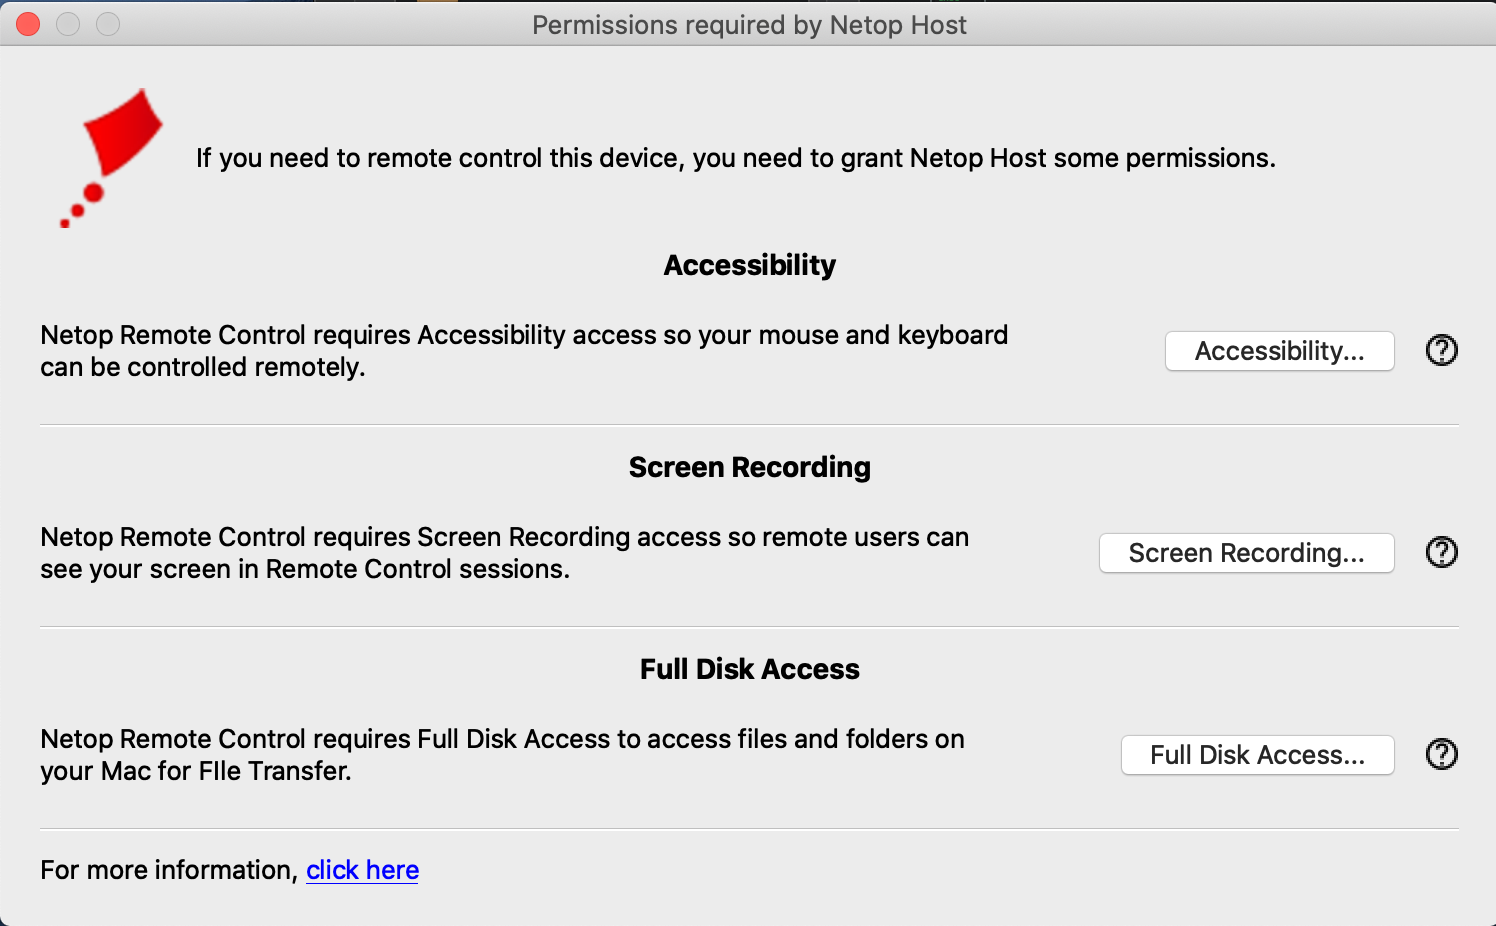
Apple introduced new security controls and policies in order to provide a better and secure environment for applications and users with the release of macOS 10.14 (Mojave) and improved by its new major release macOS 10.15 (Catalina). Applications now request permissions from the user only when they need access to certain parts of the system. These permissions need to be granted manually by the user in the Security & Privacy pane, Privacy tab. Netop Remote Control Host requires the following permissions:
Permissions explained:
In order to facilitate and offer a better user experience, after you successfully install the Netop Host, the Host prompts you to grant the necessary permissions at the click of a button. You are also prompted after you start or restart the Host, if the permissions are not granted. To grant the permissions, simply click on the respective permission button, and you are redirected to the specific permission tab in the Security & Privacy window, Privacy tab.
NOTE: The Netop Host only prompts you for the unset permissions.
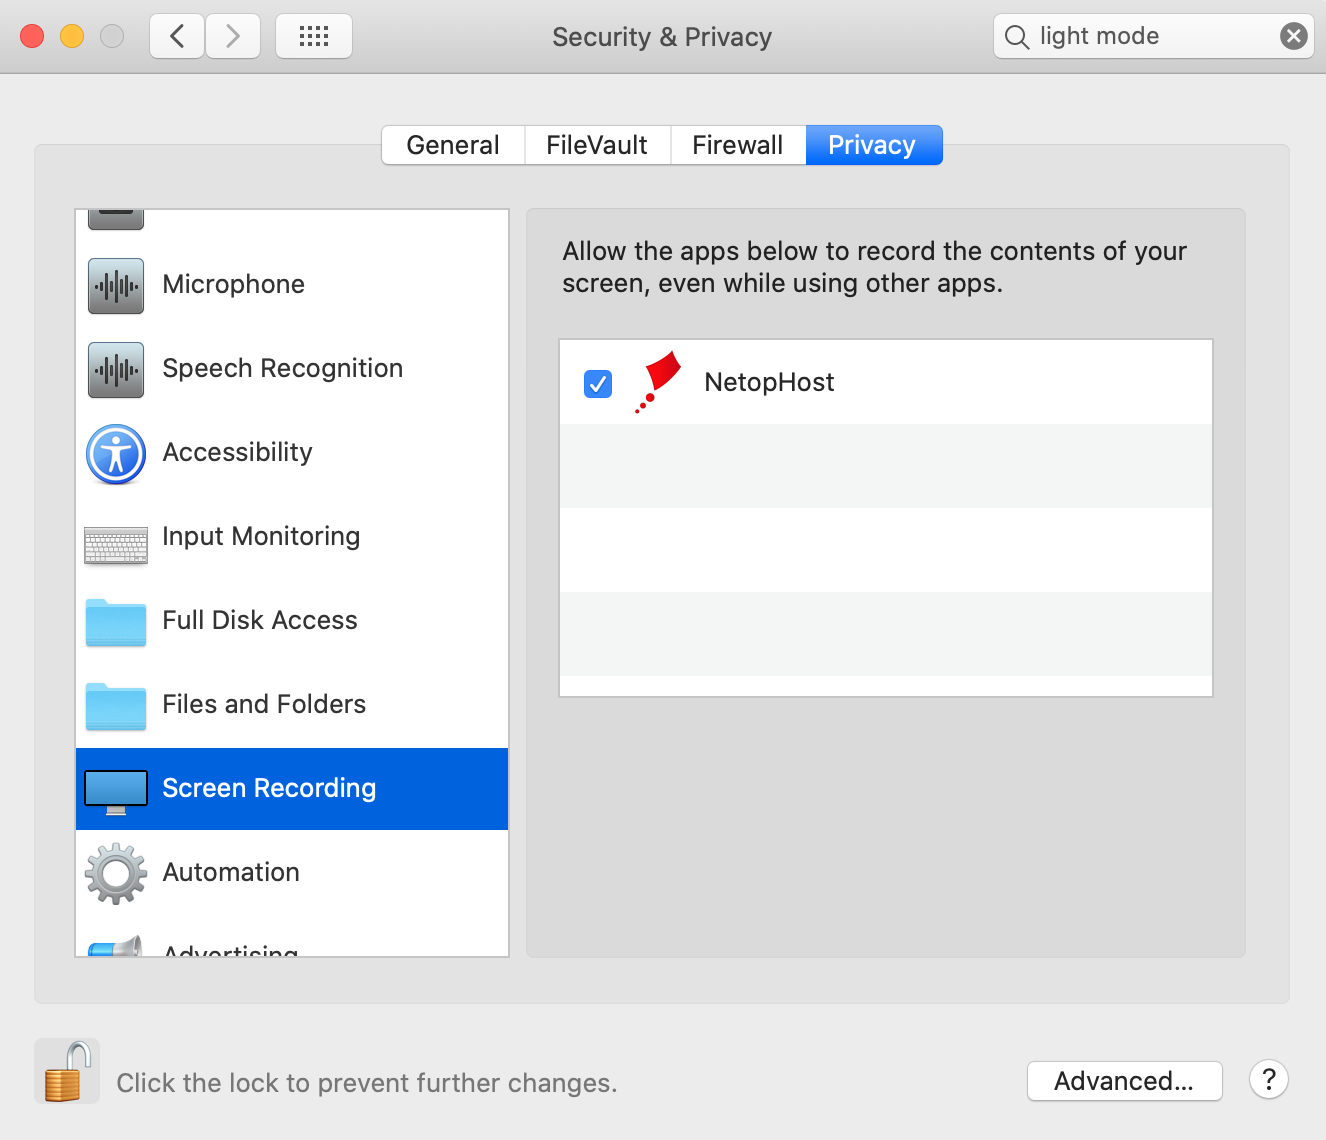
In the case that the Netop Host does not prompt you for the necessary permissions, below you find the necessary steps to manually do so. To grant the Screen Recording permission, proceed as follows:
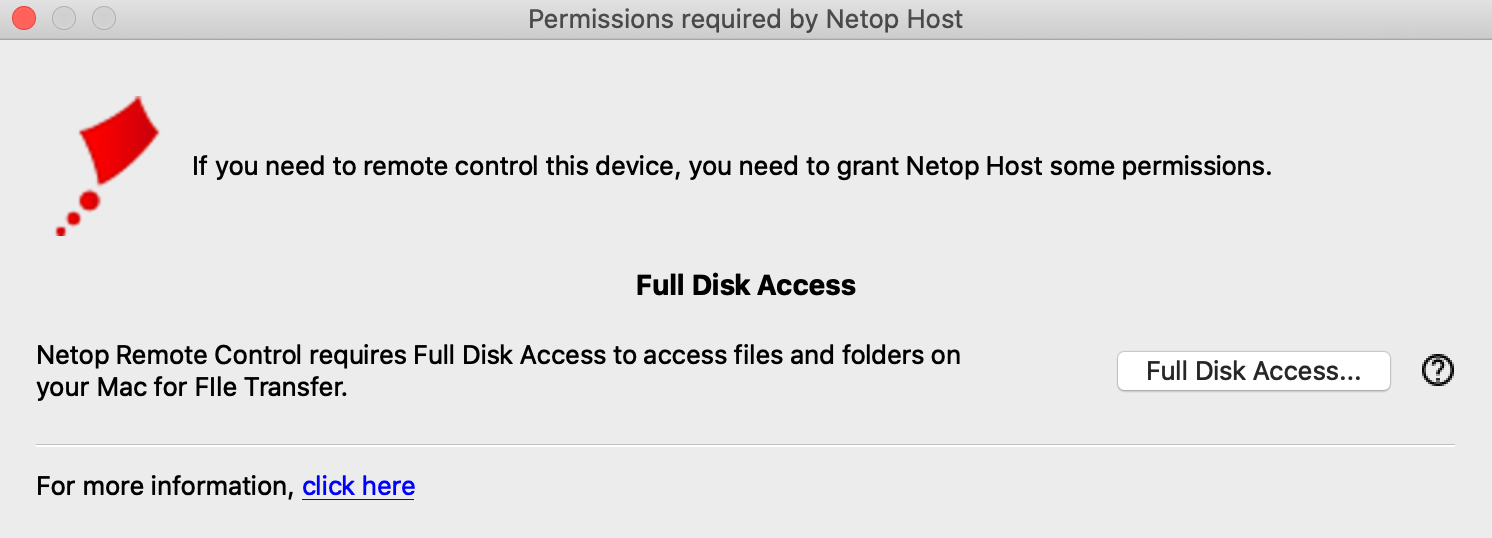
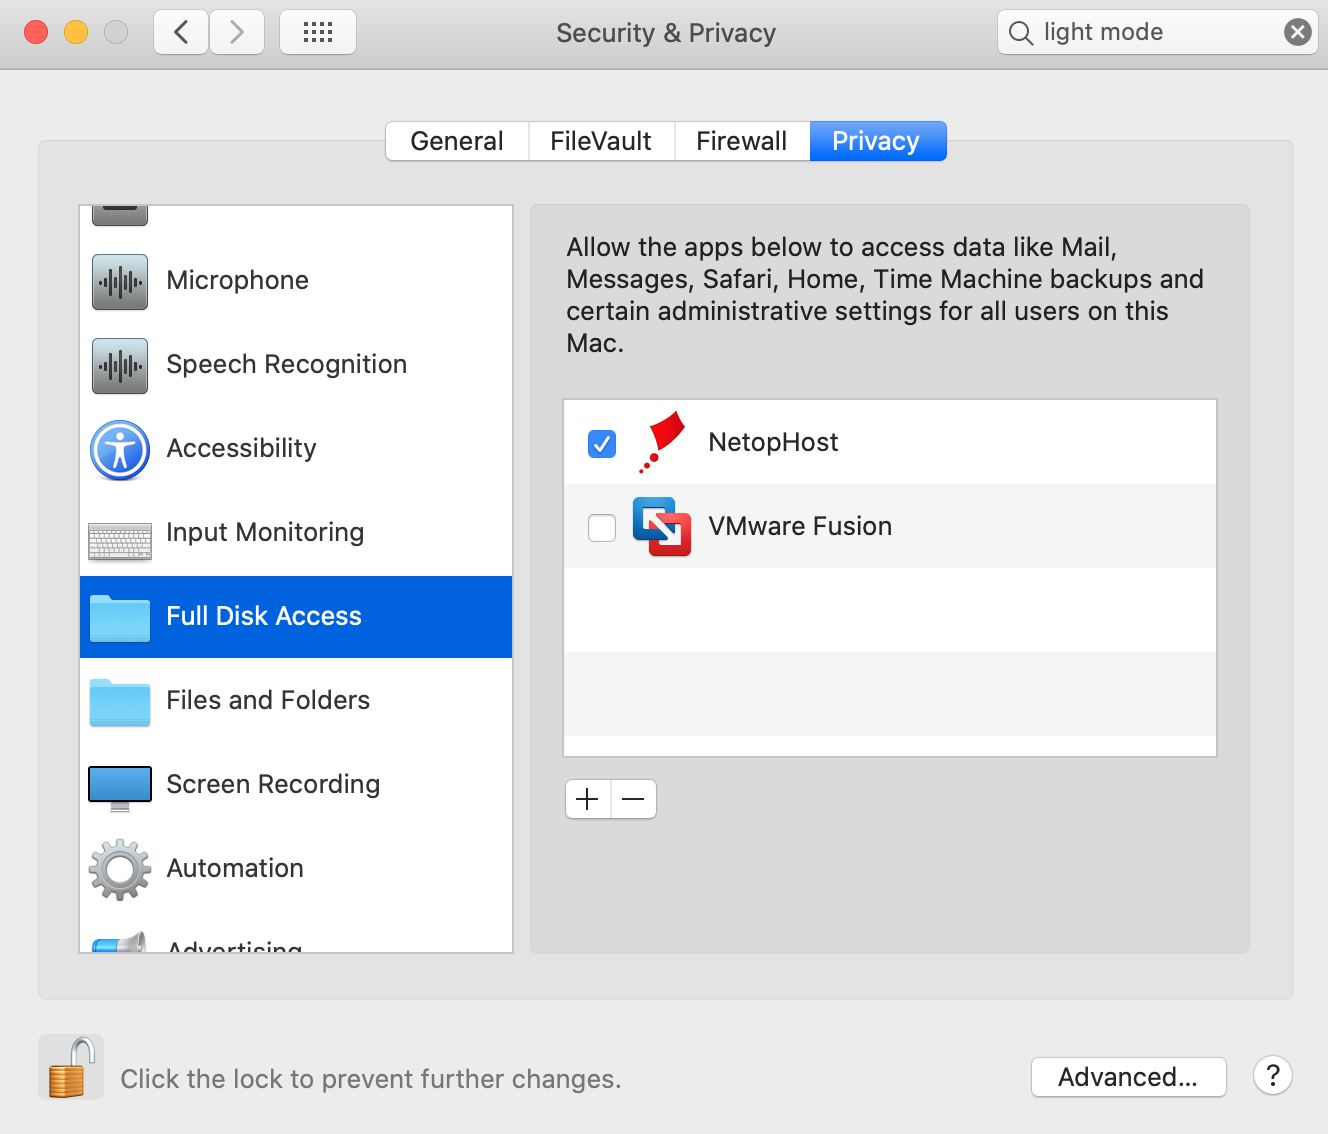
To grant the Full Disk Access permission, proceed as follows:
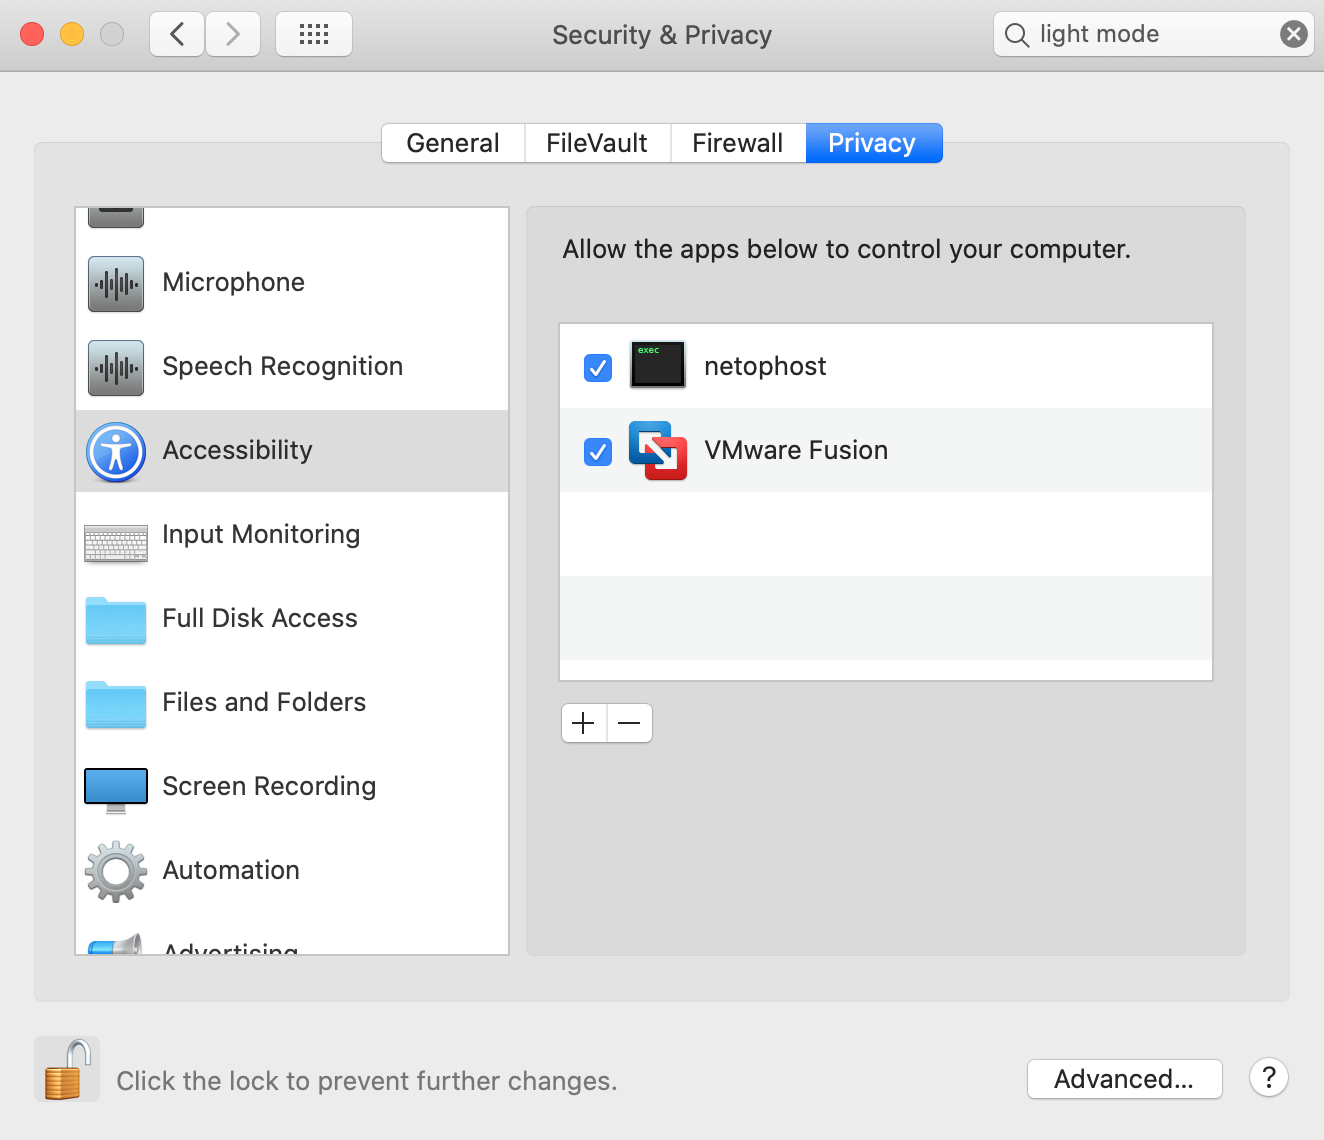
To grant the Accessibility permission, proceed as follows:
NOTE: You cannot add the Accessibility permission manually. If you remove the Accessibility permission for the "netophost", you cannot set it back again until you reinstall the Netop Host. |
||
|
| ||
Attachments

There are no attachments for this article.
|
KB Home | Search |  English English |
|
|
|
|