;)


;)
;)
;)
;)
;)
| Home » Categories » Vision 365 | ||
How to exclude applications from the Filter Web option in Vision 365 |
||
|
Article Number: 513 | Last Updated: Mon, Dec 2, 2019 1:18 PM
|
||
Make sure that you have the Student Control Component installed before you proceed. To achieve this, it is necessary to modify the VisionSystemBroker registry key. The default path for the VisionSystemBroker registry key is: For Windows 32 bit, VisionSystemBroker can be found in the following location - HKEY_LOCAL_MACHINE\SOFTWARE\Netop\VisionSystemBroker
For Windows 64 bit VisionSystemBroker can be found in the following location - HKEY_LOCAL_MACHINE\SOFTWARE\WOW6432Node\Netop\VisionSystemBroker
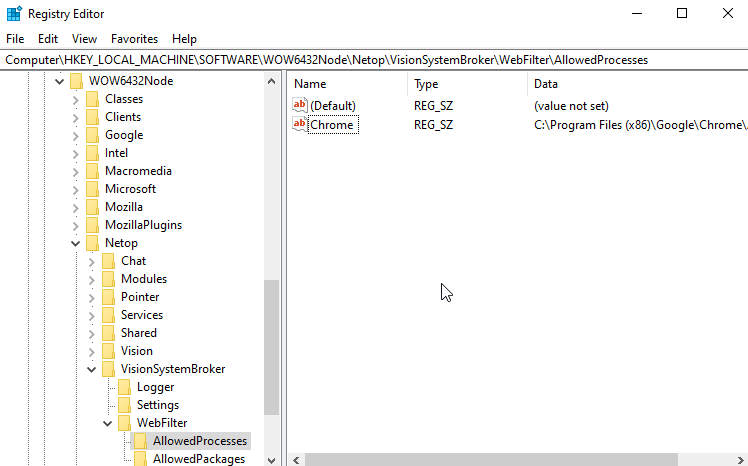
1. In the Windows search bar, search for Registry Editor. 2. Run the Registry Editor as administrator. 3. Find the VisionSystemBroker registry key in HKEY_LOCAL_MACHINE. 4. For desktop applications, create the AllowedProcesses registry key as a child of the WebFilter registry key. 4.1. Create a REG_SZ registry value. 4.2. Add the full path of the excluded application as Value data to the REG_SZ registry value created in step 4.1. In the image below the Chrome desktop application is allowed to connect to the Internet when the Filter Web option is Enabled.
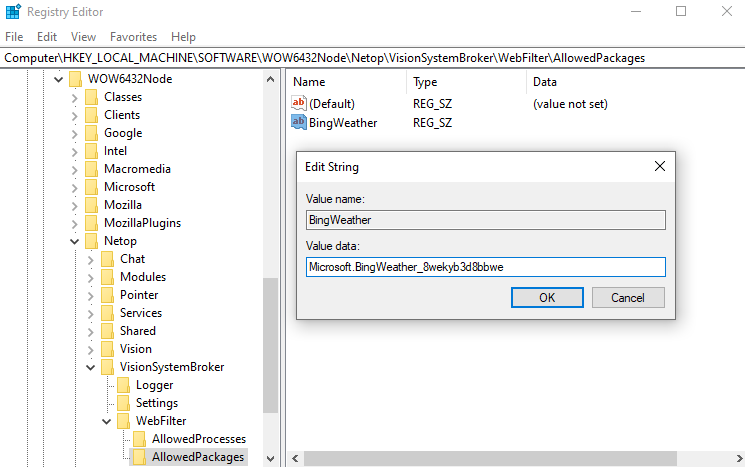
5. For Universal Windows Platform (UWP) applications, create the AllowedPackages registry key as a child of the WebFilter registry key. 5.1. Create a REG_SZ registry value. 5.2. Add the PackageFamilyName as Value data to the REG_SZ registry value created in step 5.1.
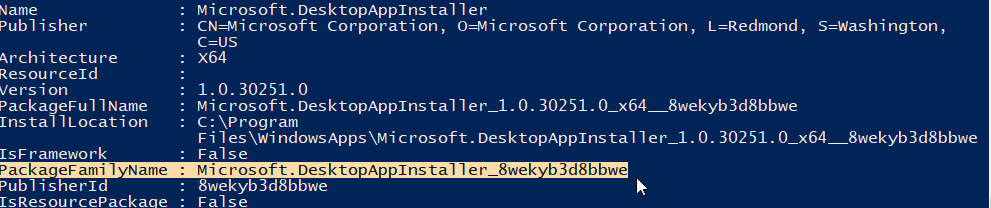
NOTE: Use the AppxPackage PowerShell cmdlet to get the package family name of the UWP application.
|
||
|
| ||
Attachments

There are no attachments for this article.
|
KB Home | Search |  English English |
|
|
|
|